
Perler beads, also known as melty beads or fuse beads, offer a world of creativity and endless possibilities. These small, colorful plastic beads can be arranged and melted together to create beautiful, pixelated designs. If you're just starting out with Perler beads, it can be overwhelming to know where to begin. This guide will walk you through all the essential steps, tools, and tips to get you started on your Perler bead journey.
1. Understanding Perler Beads and their Uses
Perler beads are cylindrical plastic beads that are usually about 5mm in diameter. They come in a wide range of colors and can be fused together using heat. These beads are commonly used for creating jewelry, decorative items, keychains, and even 3D designs. Before you start, familiarize yourself with the different types of Perler beads and their uses, as this will help you plan and execute your projects effectively.
2. Gathering the Essential Tools and Materials
To begin your Perler bead journey, ensure you have the necessary tools and materials. Here are the essentials:
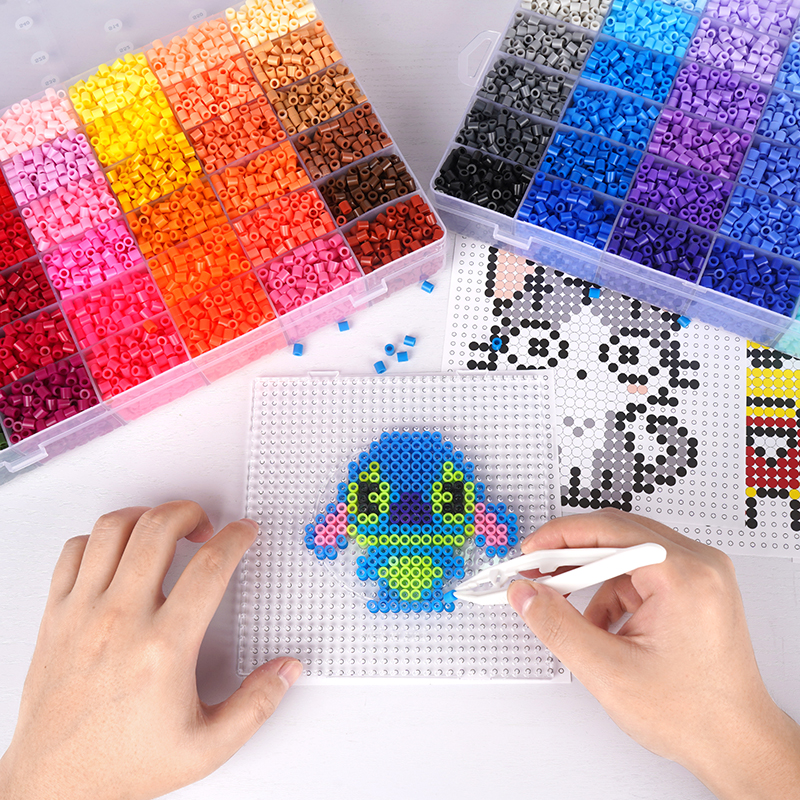
- A Perler bead pegboard: This board acts as the base on which you will arrange your beads.
- Perler beads: Start with a variety of colors to give you options for your designs.
- Ironing paper: This special paper allows you to apply heat and melt the beads without damaging your iron.
- An iron: Used to melt the beads and fuse them together.
- Tweezers or an ironing tool: These tools will help you handle and arrange the beads more easily.
- A pattern or design: Either create your design or find inspiration from online resources or Perler bead pattern books.
3. Designing and Creating Your Perler Bead Art
Now that you have your tools and materials ready, it's time to start creating! Here's how to design and bring your ideas to life:
- Choose a pattern or create your own design: You can find numerous patterns online or create your own using graph paper or Perler bead design software.
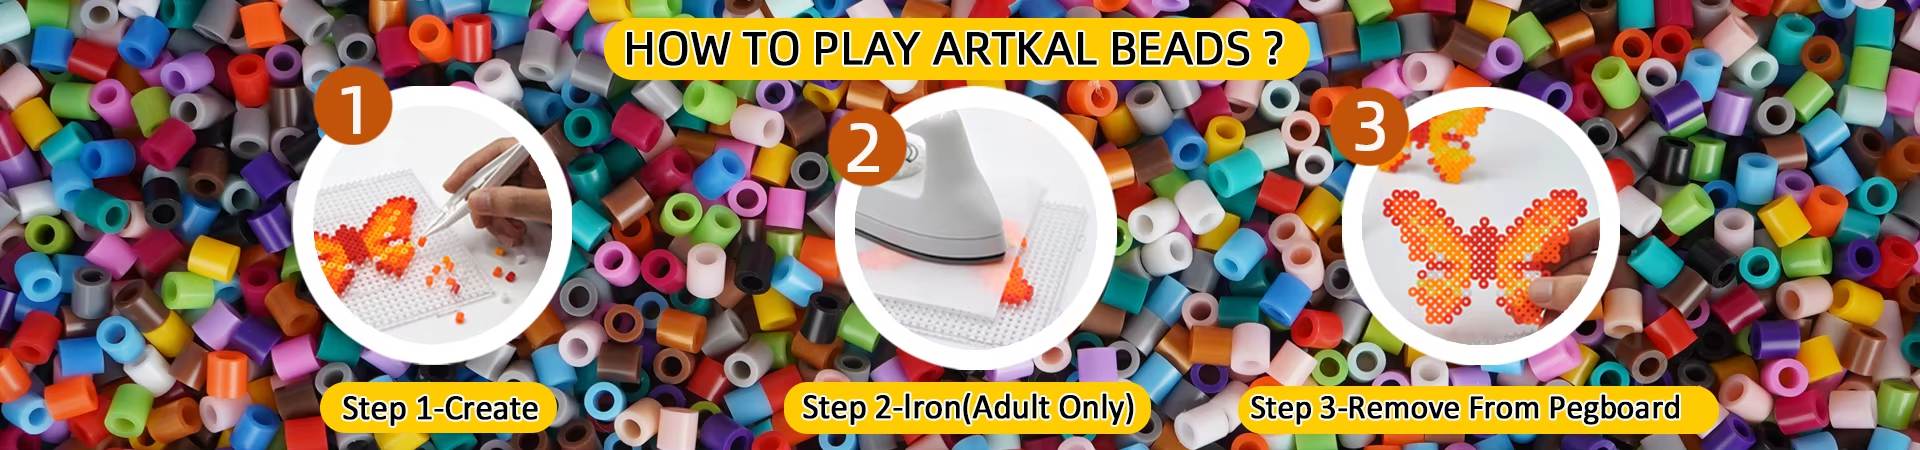
- Place the Perler beads onto the pegboard: Arrange the beads on the pegboard according to your chosen pattern or design. Use the tweezers or ironing tool for precision.
- Melting the beads: Once you are satisfied with your design, place the ironing paper over the beads and heat them using an iron. Follow the manufacturer's instructions for heat settings and timing.
- Cooling and removing the artwork: Allow the fused beads to cool completely before carefully removing them from the pegboard. Flip the artwork over and iron the other side for added durability, if desired.
4. Exploring Advanced Techniques and Ideas
Once you become comfortable with the basics of Perler bead art, you can start exploring more advanced techniques and ideas. Here are a few suggestions to take your creations to the next level:
- Mixed media: Combine Perler beads with other materials like clay, wood, or fabric for unique, multidimensional designs.
- 3D creations: Build three-dimensional structures by stacking and fusing multiple layers of Perler beads.
- Glow-in-the-dark beads: Add an extra touch of magic to your designs by incorporating glow-in-the-dark Perler beads.
- Texture and shading: Experiment with different bead placement and color combinations to create texture and shading effects.
5. Showcasing and Sharing Your Perler Bead Art
Once you've created your Perler bead masterpieces, it's time to showcase and share your art. Here are a few ideas:
- Frame your artwork: Display your creations in picture frames to showcase your talent and add a personal touch to your home decor.
- Create jewelry and accessories: Turn your Perler bead designs into necklaces, earrings, or keychains to wear or give as gifts.
- Gift your art: Share your Perler bead creations with friends and family as unique and handmade presents.
- Join online communities: Connect with fellow Perler bead enthusiasts by joining online forums, groups, or social media communities to exchange ideas, patterns, and tips.
In Conclusion:
Starting with Perler beads can be a fun and rewarding creative journey. Remember to begin by understanding the materials, gather the necessary tools, and experiment with designs. As you gain experience, explore advanced techniques and share your art with others. With patience and practice, you'll soon become a Perler bead master. So, let your imagination run wild and enjoy the colorful world of Perler beads!